
We come across broken access control vulnerabilities frequently during penetration testing engagements and it’s the most prevalent web application security risk on the 2021 OWASP Top 10. In today’s blog we’ll showcase how Burp Suite’s compare site map functionality can be used to help effectively identify access control flaws.
What is Broken Access Control?
Broken access control occurs in an application when a user gains unauthorised access to a resource or privileges by exploiting a flaw in the application. This can lead to the exposure, loss, manipulation and/or theft of user data and in many cases denial of service. Common types of access control issues include:
- Insecure Direct Object References (IDOR): Where an attacker manipulates input, such as changing a URL parameter, to access objects or data they’re not authorised to access. For example, they might change a URL from https://example.com/user/123 to https://example.com/user/124, thereby accessing another user’s data.
- Missing Function-Level Access Control: Many web applications lack proper access control checks for various functions or actions. An attacker may, for instance, manipulate a request parameter to create a user with privileges higher than the attacker’s. The application should consistently check the user’s permissions before executing such functions.
- Overprivileged Users: Granting users excessive privileges is a risk. Users should have the least privilege necessary to perform their tasks. A principle of least privilege should be applied to restrict access to resources and functions.
Why Compare Site Maps in Burp Suite?
Identifying access control issues in an application can be a time-consuming process if each request is checked manually and you’re likely to overlook key functionality. We therefore use certain tools and techniques to make the process more efficient and to ensure more reliable vulnerability coverage.
The site map comparison technique involves first manually crawling the site as User A with Burp Suite and then making the same requests using the session token(s) of User B. This effectively allows you to see at a glance how the application responses differ between User A and User B for each request.
In the results, you’ll be looking for data in the responses that should only be accessible by User A. Where a similar response is received for User B, further investigation can then be undertaken to see if a vulnerability exists.
The technique will work for almost any application but depending on how the application handles CSRF mitigations, the technique’s results may be restricted.
Comparing Site Maps in Action
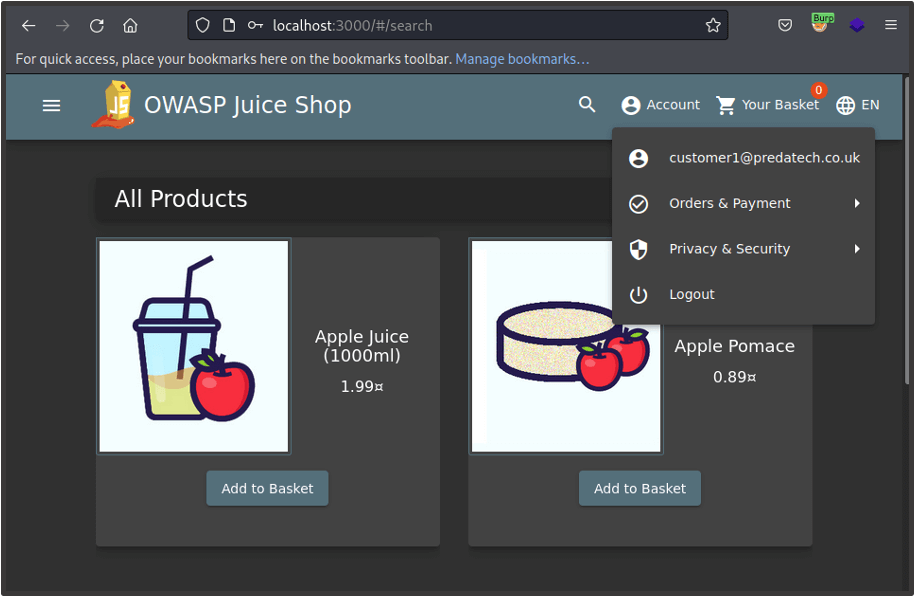
To demonstrate comparing site maps, we’ve spun up an OWASP Juice Shop instance on the local machine. We’ll be looking at an access control issue between two users of the same privileges/role.
We begin by creating a new user (Customer 1) and then manually click through the site, making sure that all application functionality is captured.
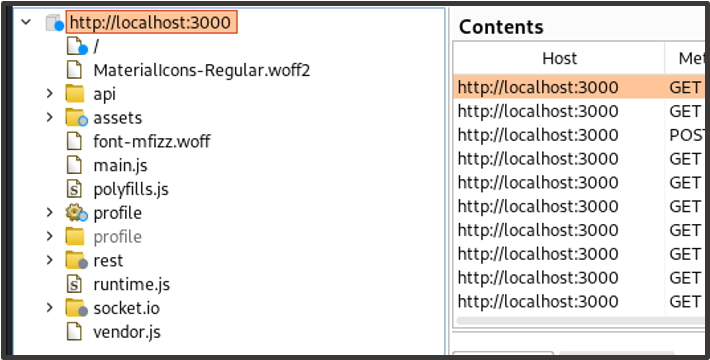
As we crawl the site, the site map in Burp Suite’s Target tab will begin to populate.
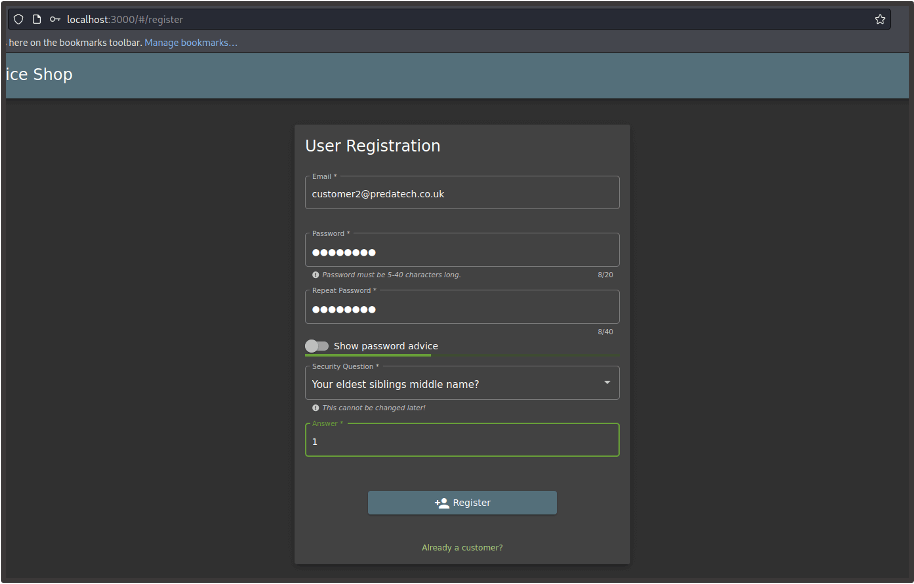
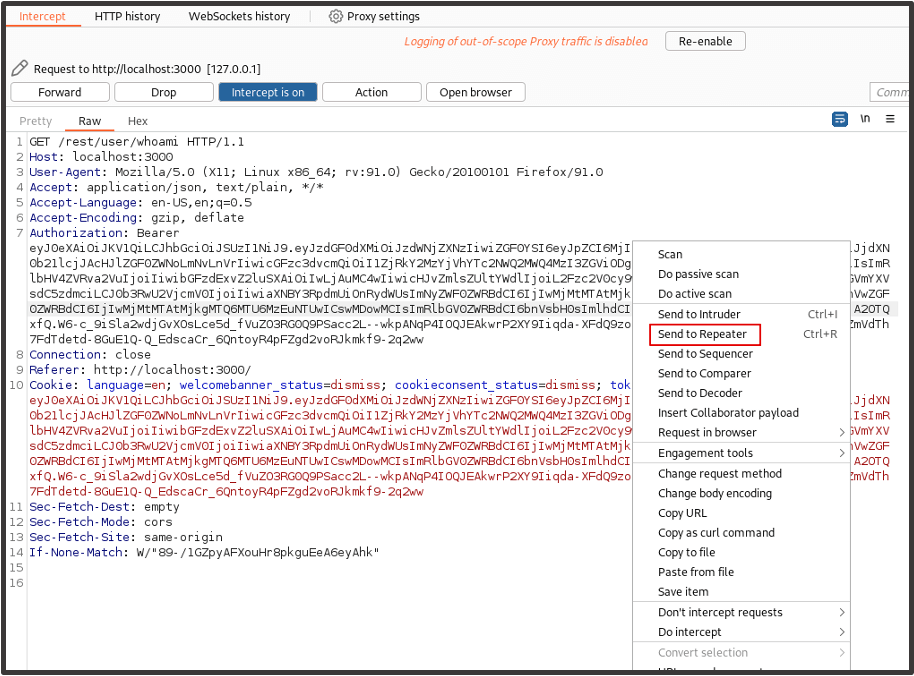
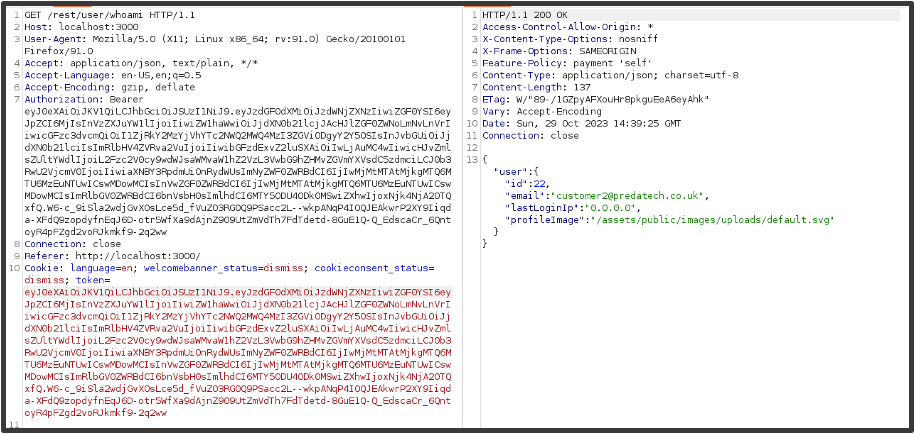
Once the site map has been populated, we register a new user (Customer 2) and capture a request once logged in to identify the session token(s).
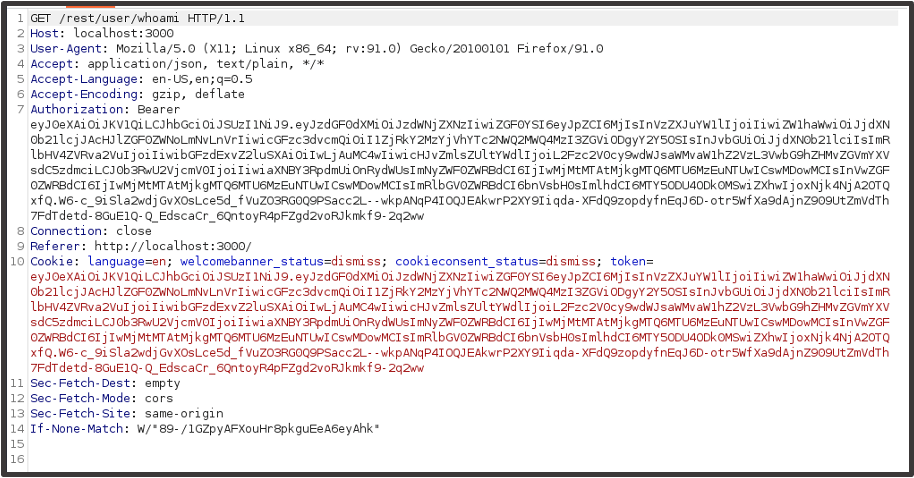
It appears the application may be using a Bearer token and/or a cookie named ‘token’ to manage Customer 2’s session.
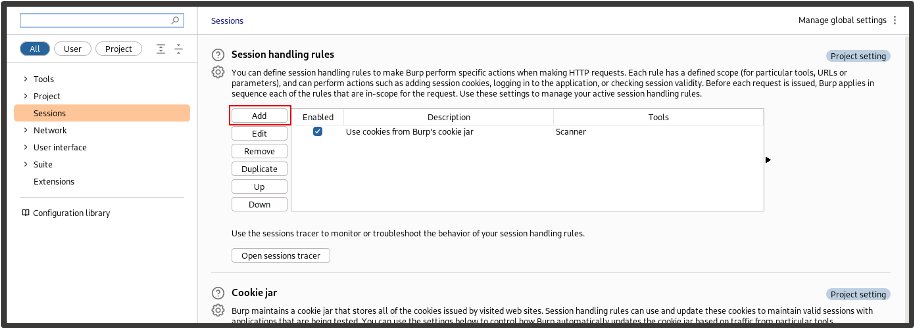
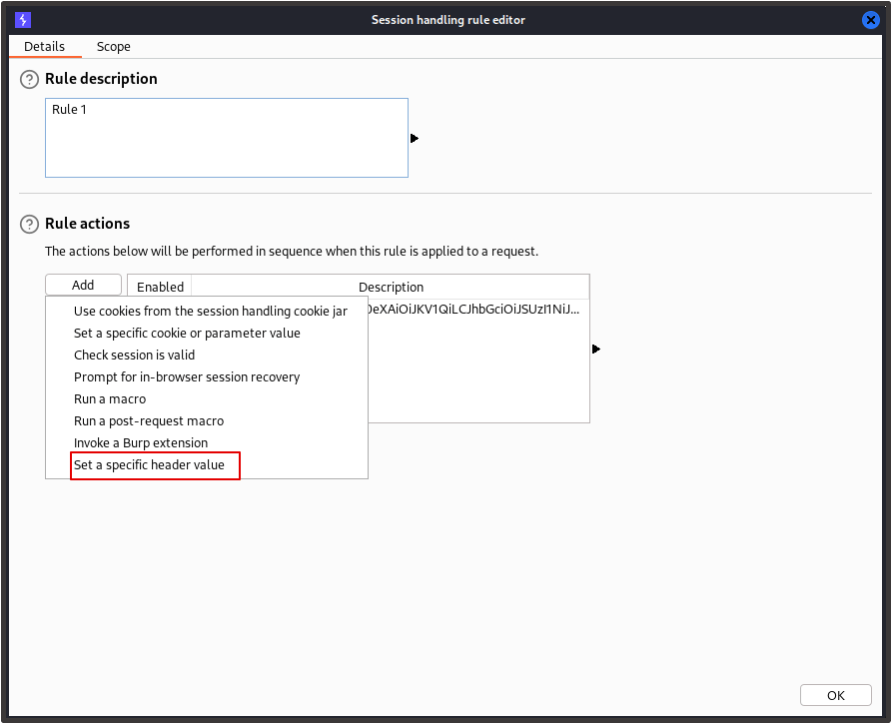
In Burp Suite, we go to Settings, open the Sessions tab and click ‘Add’ to add a new session rule.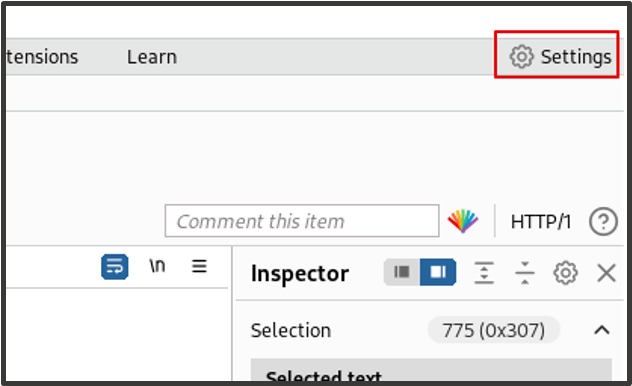
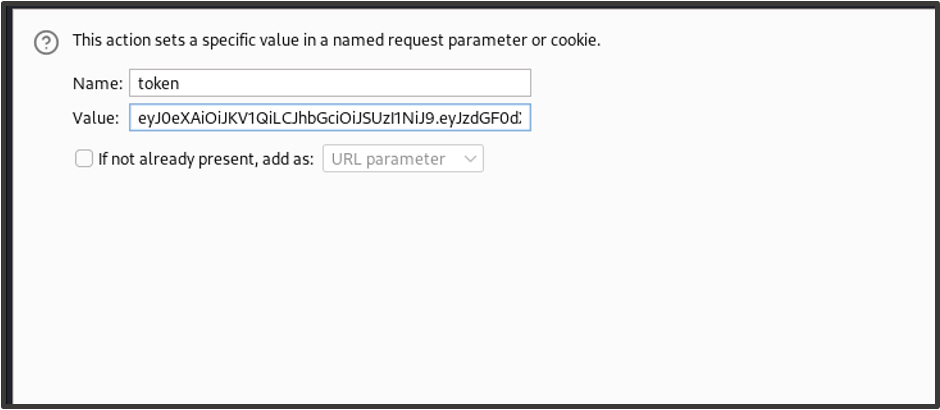
Here you can add the session token in whatever format your application uses. Here we’ll add a rule for the ‘Token’ cookie and for the Authorization header. For the cookie value, click ‘Set a specific cookie or parameter value’ and enter the details for the ‘token’ cookie.
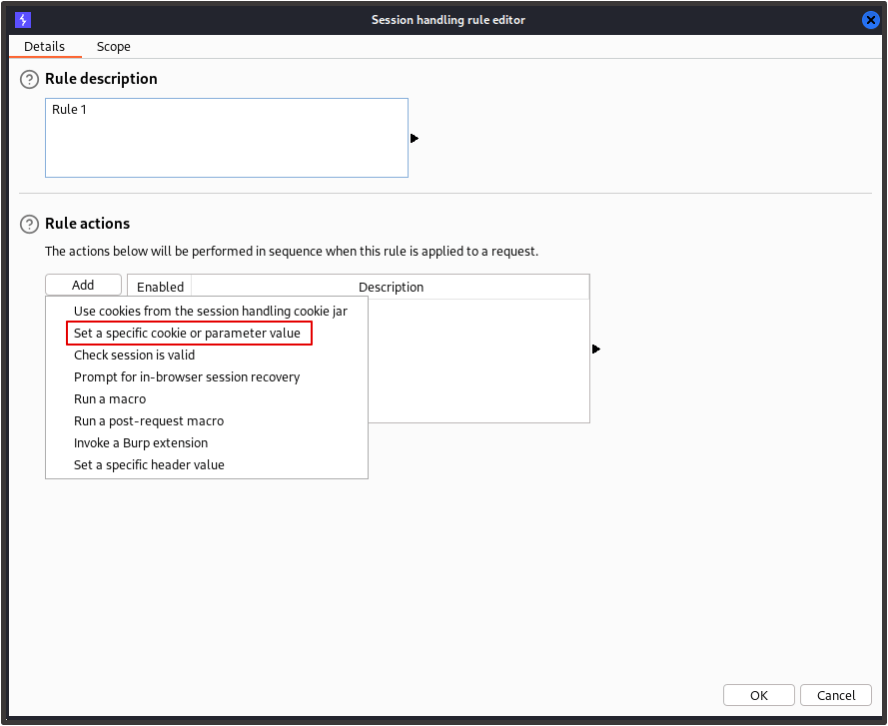
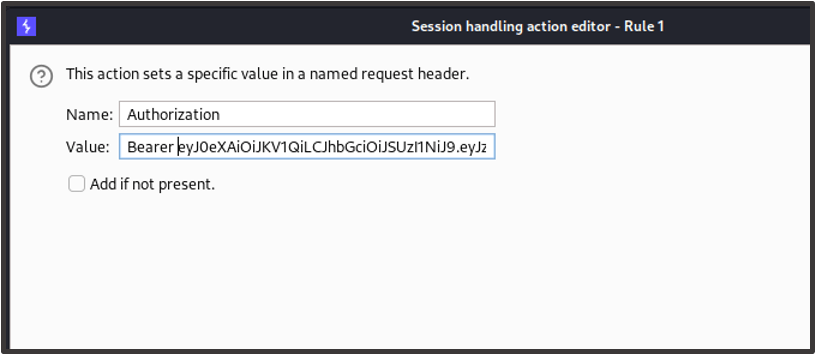
Where the application uses a bearer token / the Authorization header to maintain the user’s session, click ‘Set a specific header value’ and enter the header details from the captured response.
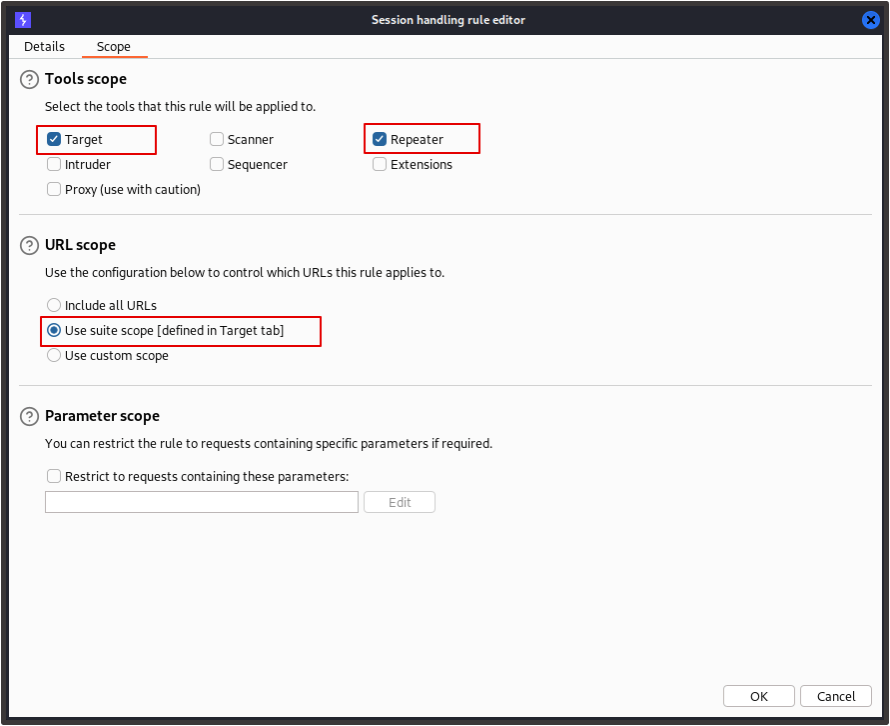
For the session rule’s scope, choose the ‘Target’ and ‘Repeater’ tools and select ‘Use suite scope [defined in target tab]’ for the URL scope. Now click ‘OK’.
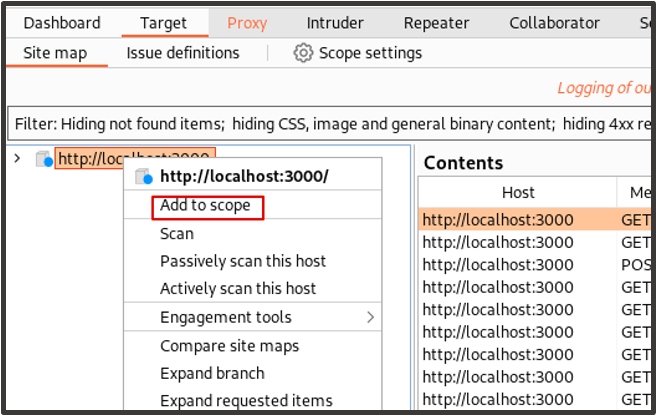
We now want to add our application to the suite scope in the Target tab so that our session rule applies for the tools selected.
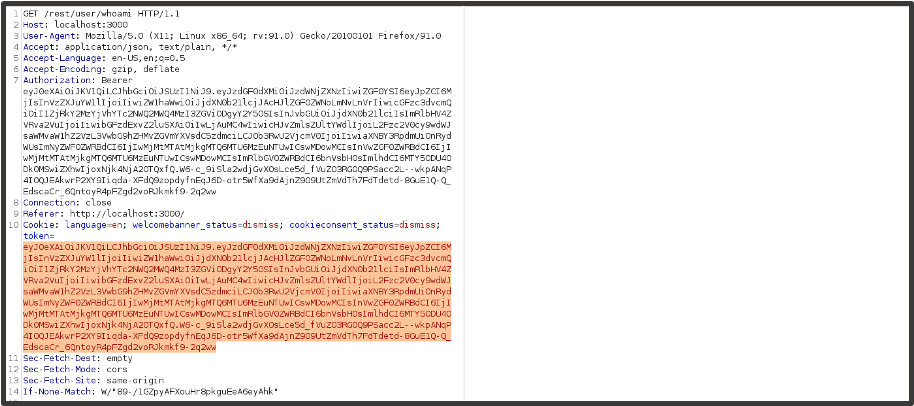
Now the session rule and our scope are defined, we’ll want to make sure that the rule works for any requests that pass through the set tools. We’ll send an authenticated request as Customer 2 to repeater and check this.
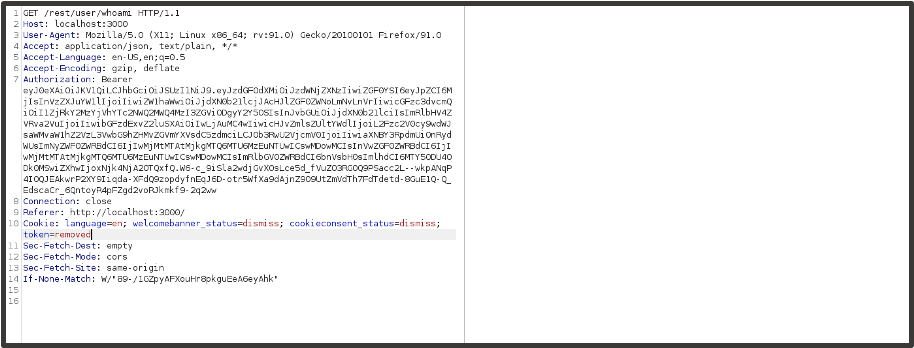
We’ll then want to replace one of the session tokens with a different value such as ‘removed’. If the request parameter value then automatically changes back to the cookie value and you get a valid response then the rule has worked.
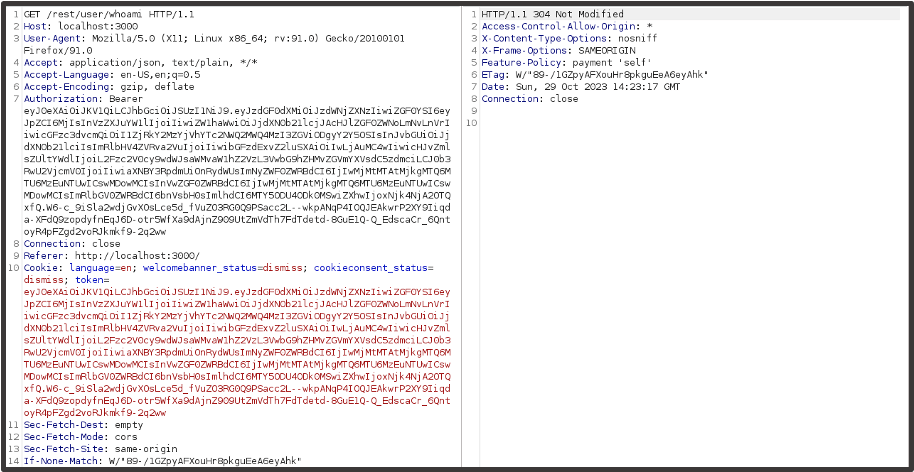
We receive a successful response and can verify data is being received by removing the four cache headers at the bottom of the request.
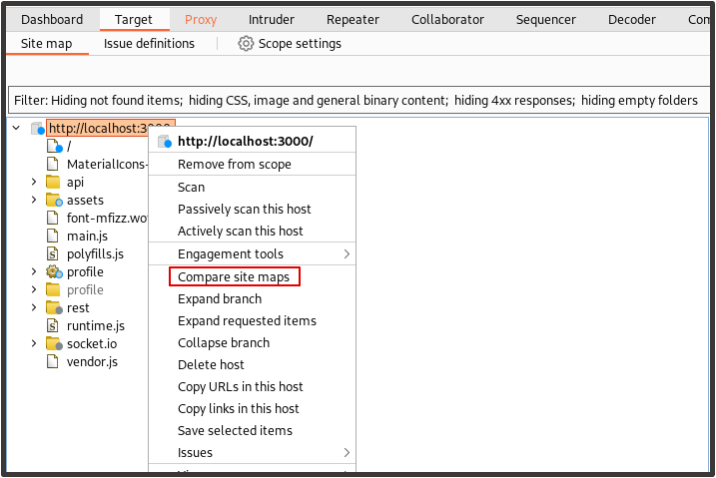
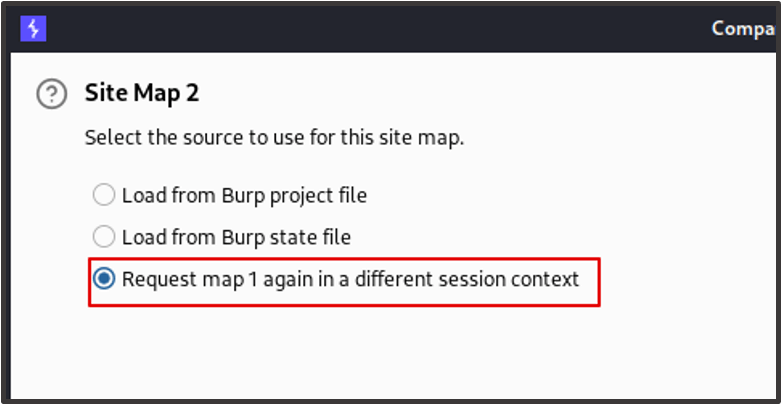
We’re now ready to compare the site maps. In the Target tab, we click on the root object for our application and click ‘Compare site maps’.
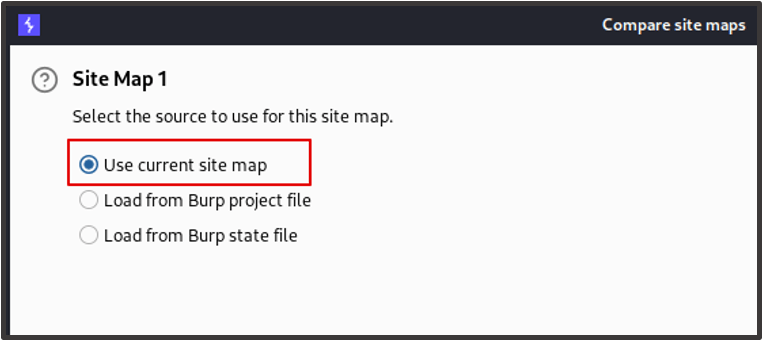
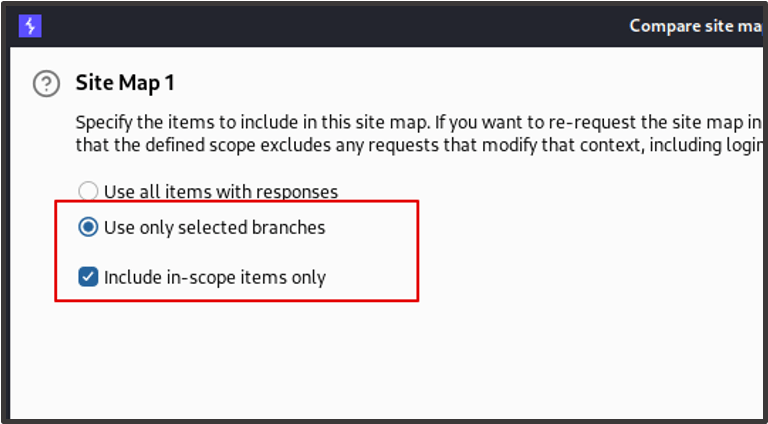
When prompted for the configuration, we choose ‘Use current site map’ and then select ‘Use only selected branches’, ensuring that ‘Include in-scope items only’ is checked. For site map 2, we choose request map 1 again in a different session context. We can then click ‘Next’ for the rest of the wizard and leave the other configurations as default.
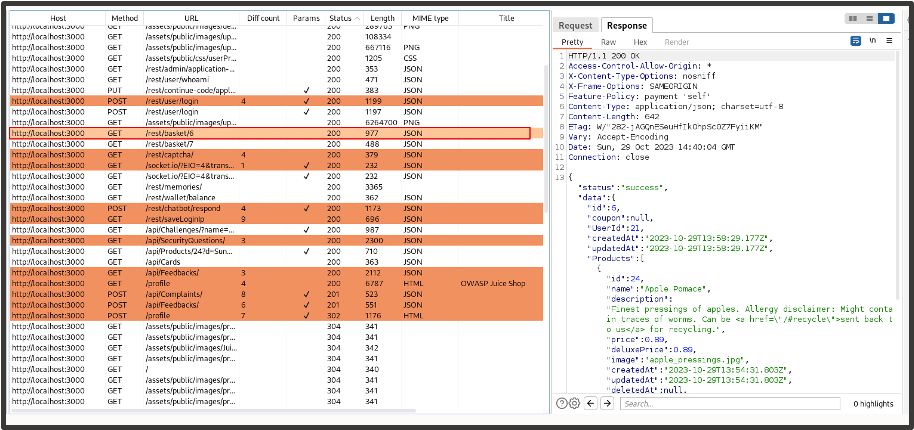
The site map of Customer 1 will now be requested with the session rules of Customer 2. When the results are returned, we see two site maps. The upper site map contains the requests that were made during our manual crawl with Customer 1 and the lower site map shows the same requests made for Customer 2.
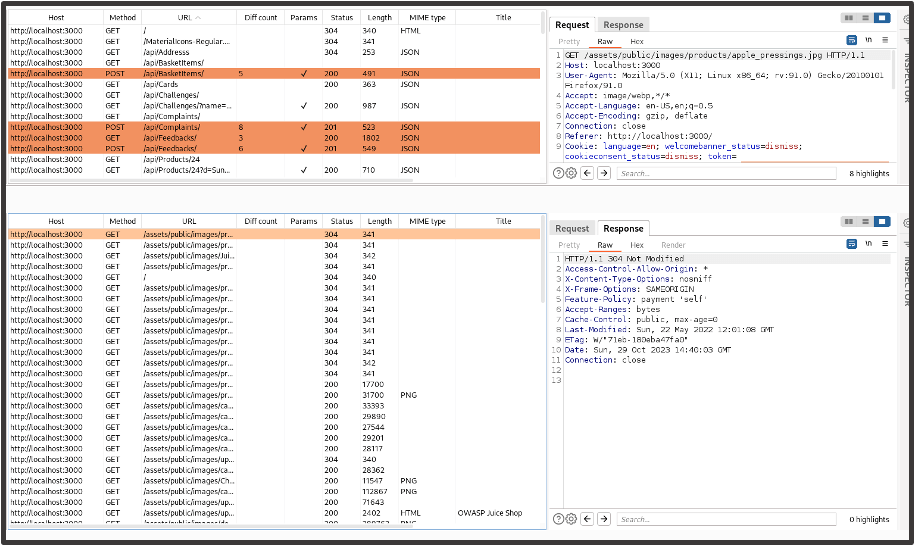
It’s Customer 2’s site map we want to focus on. We filter the Status column so that the response codes are organised, starting with requests with a 200 status code. The orange highlights show that there is a difference in the response data between both site maps. This should be ignored as both highlighted and non-highlighted requests could reveal an access control issue.
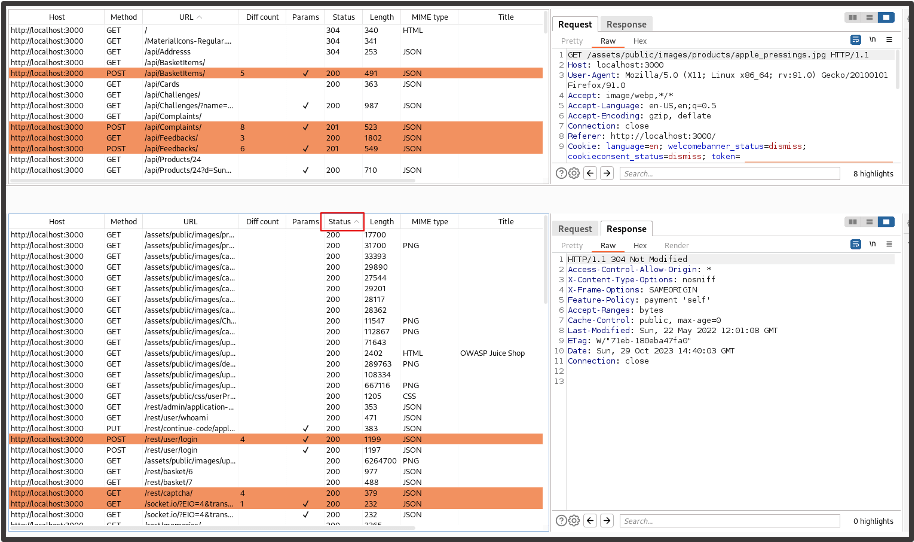
We begin reviewing each response we’ve received, looking for data that doesn’t belong to Customer 2 or functionality they do not have permissions to access. Some of the requests will return data for Customer 2 which is to be expected (example below).
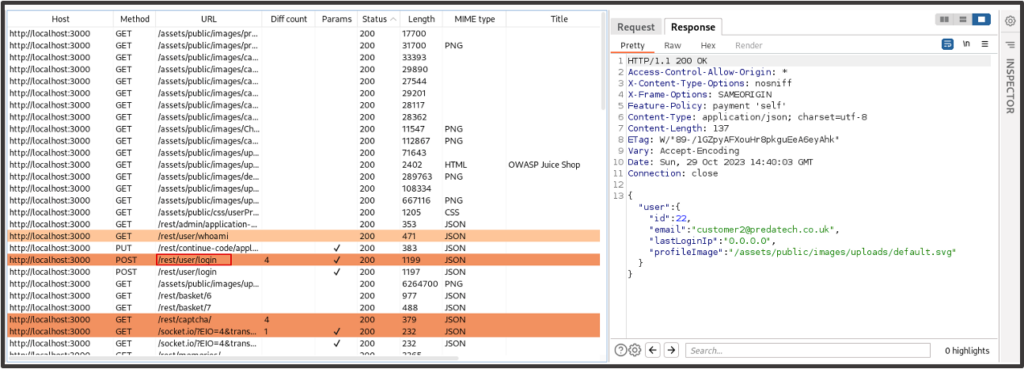
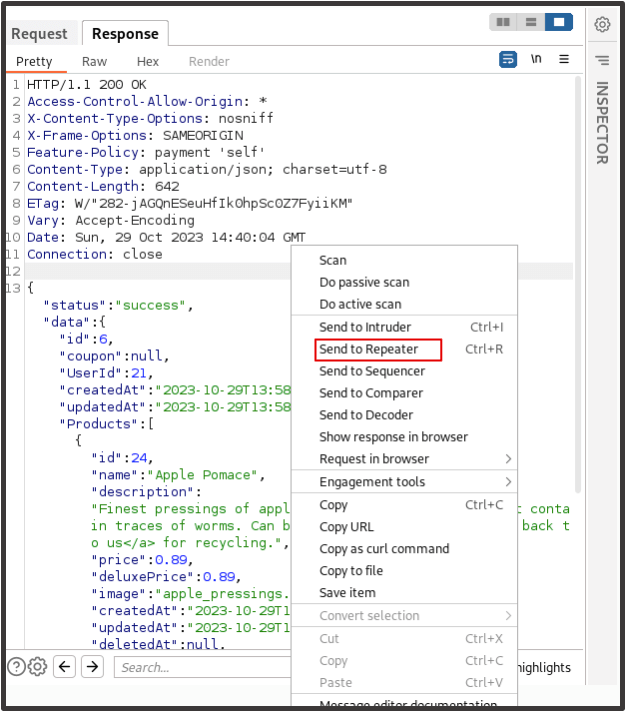
After reviewing some of the results, we come across a request (/rest/basket/6) which shows data that doesn’t belong to Customer 1. We send this to Repeater for examination.
Upon further inspection, it seems there’s an insecure direct object reference vulnerability in the basket functionality which allows us to view the basket of any user in the application.
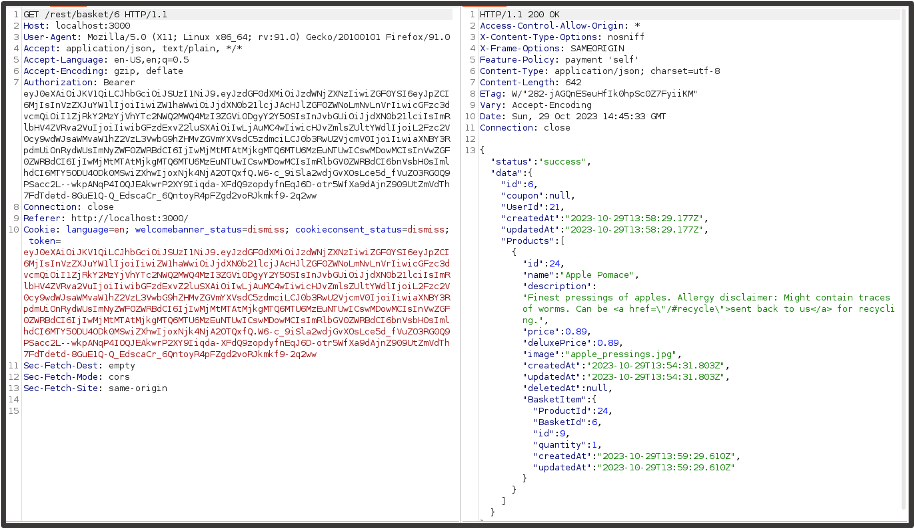
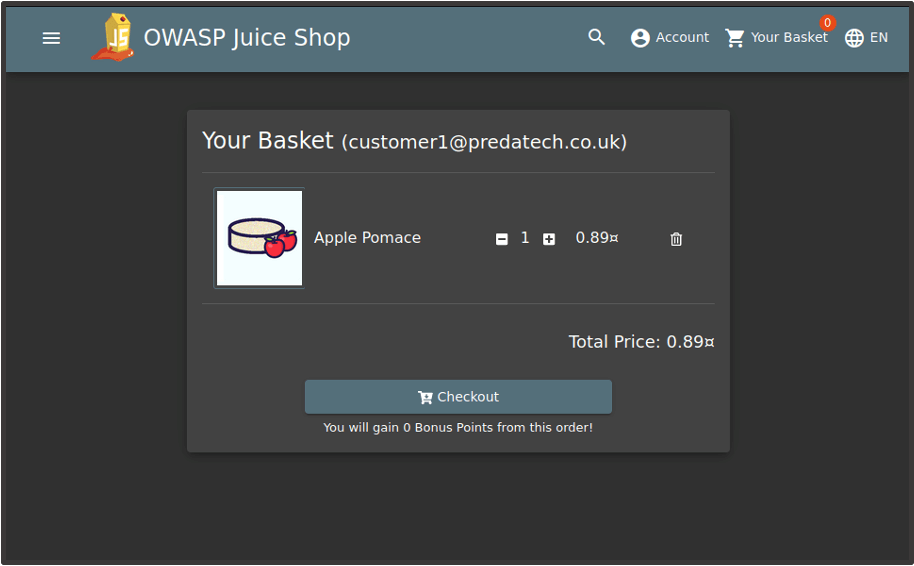
In this case we’re viewing the basket data of Customer 1.
This is a basic example of how comparing site maps can help identify access control issues, but the technique can be invaluable, particularly in larger applications where you may not have the resource to check discrepancies between users manually.
Predatech is a cyber security consultancy that offers a range of services including CREST accredited penetration testing and Cyber Essentials/Cyber Essentials Plus assessments. What makes us different? We combine expert cyber security with great customer service and value for money. If you’d like to better understand your security posture, and how to strengthen it from attacks including broken access control, please contact us for a free consultation.